Pages

Sunday, 14 October 2012

Working Under Lights

Just like with human eyes, a camera can only capture the images for a movie through light. Whether using available lighting, natural lighting of the surroundings or using professional lighting equipment, every production requires a suitable lighting design according to the needs of the film's story and the director's vision. Every lighting set-up provides a specific mood, emotion and atmosphere to the overall film viewing experience. Without light, it is not possible to see anything, and it is not possible to shoot a film.
Today, we studied lights and how they effect our images in terms of setting, the mood and the atmosphere. For example, a low lighting would create a gloomy atmosphere, while a bright image would lead to the anticipation of a good news. 
In cinematography, we were taught about the 3-point set-up whereby we need three lights to create a good balance between the lights on the subject. This set-up deals with the key light that is the main source of lighting a subject, a back light which is used to light up the contours of our subject and a fill light that is used to scatter or balance the key light on our subject in such a way that all the shadows are filled in with a warm light. 

Key Lights:-

The placement of lights when producing a key light is ideally at an angle of 45 degrees from the subject and at eye-level. Had the lights been placed at a higher angle than that pf the subject, it would have caused shadows on the subjects face, leading to the impact of dark circles under the eyes, wrinkles on the face as all the details are exaggerated in this placement, however, this placement would work best if one wants to give an old, tired look to the subject. Key light is basically of two types, depending on the sort of environment we want to create for our subject. 

High Key Light:
A high key light deals with an overall bright image with no contrast levels whereby the subject is lit up on all sides and evenly through the image, leading to the formation of a balanced image. A basic drawback of a high key light is the exposure compensation of our cameras so as to ensure that the correct exposure is formed. A high key image usually depicts a happy, joyful environment or individual.


Low Key Light:
A low key light deal with an overall dark image with black as the controlling colour. A low key image has high contrast levels and it is usually based on a silhouetted image whereby the placement of lights leads to the flaring of the image around the contours of the subject alone. A rim light may be an example of a low-key image. A low key light usually depicts a gloomy and sad environment and gives a depressing feel to the mood of the film.


Back Light:-
Back lighting, also known as Rim Light, refers to the process of illuminating the subject from the back. In other words, the lighting instrument and the viewer are facing towards each other, with the subject in between. This causes the edges of the subject to glow, while the other areas remain darker. Back lighting helps to provide separation between the subject and its background. A fill flash may be used with a back lit subject to yield more even lighting.
The vertical angle of the back light can change the effect. A low angle could cause the light to hit the camera lens, causing a lens flare. A high angle could cause the nose of the subject to extend out from the mostly-vertical shadow of the head, producing a potentially unwanted highlight in the middle of the face.
Following is my experiment with the back light.


Fill Light:-

In television, film, stage, or photographic lighting, a fill light is used to fill the shadows created by the key so that the image doesn't look so dark. The fill will usually be softer and less bright than the key. To achieve this, you could move the light further away or use any light-scattering medium such as a diffuser or a reflector. These devices redirect or alter the amount and direction of existing light. Disc or oval-shaped reflectors and diffusers are available  in several different sizes. Portable, they collapse and fold so you can store and carry them in handy carry cases.

Diffuser:-
 In our school premises, we have limited availability of studio lights due to which our ability of achieving a balanced light image with correct exposure. Due to these constrains, we  either have natural daylight to work with or the artificial lights of over-exposure. To overcome this limitations, we can use a diffuser which is a light-scattering medium such as a piece of thin fibre, placed in the path of a source of light to reduce the sharpness of shadows in order to soften the lighting.

Without Diffuser
With Diffuser
Reflectors:-
Reflectors in photography are simply any item used to reflect light towards your subject. Reflectors are either placed on a stand or other support, or held by an assistant to direct light onto a subject. Reflectors are generally held at an equal angle from the light source and the subject. Reflectors, which are available in white, gold and silver surfaces, bounce light onto a subject to fill in shadows and can add highlights and contrast to a subject.
Gold reflectors bounce a “warmer” light onto a subject, giving the subject the appearance of being photographed in the late afternoon or early morning.
Silver reflectors bounce a “cooler” light onto a subject giving a more intense or harsher feeling.
White reflector is used to bounce your key light to 'fill' in shadows on the opposite side, or to bounce a little light anywhere where you want to throw a little light to lift the shadow or add a small highlight. It's obviously not as powerful as a separate fill light.
Black reflector is used to stop light spill or by helping in stopping it from bouncing around all over the place, or sometimes may be used as a 'flag' to stop light from, say like, spilling backwards onto the subject.
Following is my experience with a diffuser and a white reflector.

   Without White Reflector
With White Reflector                                                           

Media Trip to Paragon Academy of Performing Arts


We went to the Paragon Academy of Performing Arts (PAPA) where we met Syed Noor, a legendary director in Pakistan. 


He gave us an introductory lesson on camera works, lights, setting, backdrops and the proper location for shooting when making a movie. We discussed professional lights and how these solar powered lights help when shooting outdoors.


He showed us a professional movie making camera and told us about various lens size and how these lens help produce the required focus and the desired impact.


He showed us the sets of 'Shrika' and we asked him about breakable sets and wondered over how they were constructed out of wood. 


He was very helpful in terms of ending many of our problems with relevance to camera shots and lighting. We discussed various camera movements and about the props and the artificial rains.


He promised us future help with equipment when we constructed our own media products and offered to give us tutorials on cameras and lights to assist our final product.


We wanted to see a professional editing and buffing room, therefore, he gave us a tour of the two rooms whereby specialists were already at work on a particular movie, editting and smoothing it down.


Wednesday, 10 October 2012

Continuity Shots (Cinematography Revisited)

Continuity Shots refer to shots that are taken after a film is completed to insert wherever they are required to maintain continuity. It may be a bridging shot taken from the stock library or a shot inserted in the script afterwards.
There are various types of continuity shots, some of which we studied in our media class to be able to use in our own constructions. Following are:
Establishing Shot is usually a vista shot that covers vast area to show the location of the media product and it usually establishes an overview for better understanding of the shot that follows.Also, it sometimes establishes when a scene takes place. For example an establishing shot in the night may signify a threat or a tragedy to follow.


180 Degree Rule is a camera shot whereby two characters facing each other are shot in such a way that the camera is placed on the same side of the axis throughout the scene. If A is talking to B,the camera is placed on the left shoulder of A, and when B is talking to A, the camera is placed on B's right shoulder so that the same side of the line of axis is maintained.


30 Degree Rule is a camera shot whereby the camera captures the same subject from various positions of 30 degrees.
Cross-Cutting is a camera editing technique whereby two activities occurring simultaneously in two different locations precede one another in order to signify parallel action occurring at the same time.


Match on Action/ Match Cut occurs whereby two shots, when put together, complete an action. For example the first shot captures a race whereby many boys are running while the second shot shows one of the boys winning the race while the rest follow.
Eye-Line Match occurs whereby the first shot establishes a character's position while the following shot establishes the character's action.


Axial Cut is an editing  technique whereby the second shot captures the object or character from a farther or a closer point of view than the original one.
Point Of View Shot is one that captures another character or object from a character's own point of view and not of the camera.
Cut Away is a camera editing technique whereby an extra shot, not necessarily of significance to the main action in the film, is inserted in order to prolong the time sequence of the shot.
Buffer Shot are shots that are taken in post-production if a particular shot was not shot perfectly, initially. It is used to disguise any mistake in the film.
L-Cut shots are shots that are synchronized perfectly, however, their transitions are not very well-synced. This may be done deliberately in order to attract the audience more towards the content of the speech rather than the visuals.
Fast Cutting is an editing technique whereby the shot is very fast-paced and usually signifies an action or hyper activity.


Slow Cutting is any shot that  is longer than fifteen seconds. It is usually very slow paced and signifies the ease of the character in whatever action he is performing.


Transitions: Transitions are basically the various techniques in which a certain shot changes to another shot. For example to show a flashback, one might have to use a transition to give the impact of a change in the time sequence.

Wednesday, 3 October 2012

Scene Analysis (Camera)

This is the link to a clip from the movie, 'The Butterfly Effects 2' and following is the analysis of how the camera has been used by the director to give the movie, it's desired effect.


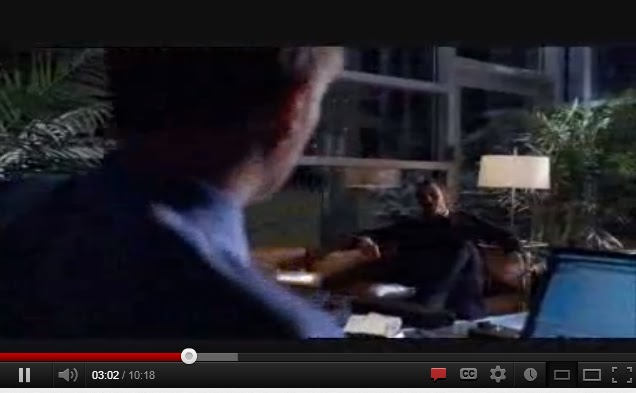
In this clip from 2:59 to 3:02 we see the camera moving in a full 360 degree angle starting from the characters face till the camera is right over his shoulder, establishing an opening sequence. A mid-shot has been taken while sufficient lead room gives the room a very spacious look.


This is a series of static shots (from 3:04 to 3:25) of the characters that are deep in conversation with one another, signifying a shot reverse shot whereby two people talking to one another can be shown from each other’s point of view. It is noticeable that both the shots have been confined to a mid-shot


In this clip from 3:33 to 3:42, the camera slightly zooms in on the character while there is no camera movement. A shot has been taken of the location and the character in it and as the camera zooms in and as the character moves closer to the camera, the shot transforms from a wide angle shot of the location to a cowboy shot of the character. In the third image, it is noticeable that the character has been captured in an anticipatory framing with sufficient lead rooms on both ends and a head room to prevent any uncomfortable shot.
                                         

This shot at 3:58 is a long shot of the character and his location. This shot forms the basis of leading lines via the trees in the background and the painted pathway on the road.


This clip from 4:03 to 4:05 shows the camera panning left while tilting upwards along the character like as if trying to follow the movement. The shot begins with a close up of the hand and ends at the characters face from a low angle.


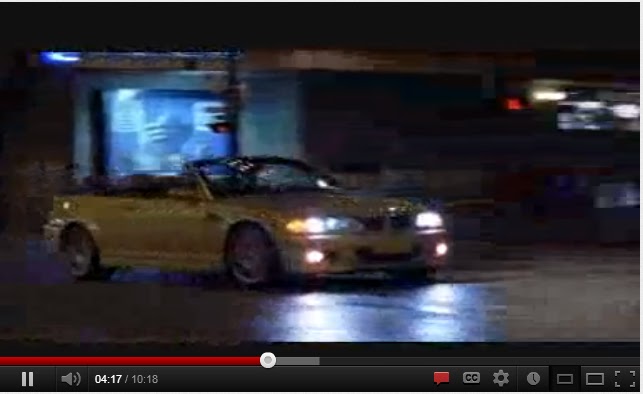
This clip from 4:15 to 4:19  shows how the camera pans right very steadily in a static shot to avoid any jerkiness; the shot is very steady and neat, as can be seen.


This shot at 4:19 shows a close shot of the character, shot in such a manner that ample head room and lead room has been assigned to the shot. Sitting in a car, this head and lead room helps create a comfortable space in the car which might not exist otherwise.


This shot at 4:54 is a mid shot of the character and shows the lead room, signifying something the character is looking ahead at. The clip from 4:55 to 5:05 shows the camera panning right from the characters back giving a full shot of the place the character has just entered. It also increases a person’s curiosity as to what is the character looking at, in the far right of the shot as sufficient lead room is again assigned to the shot. 


This clip from 5:17 to 5:21 shows the camera as it dollies out, tracking outwards as the character moves in. A cowboy shot has been used for this scene.


The first shot at 5:38 shows a full shot of the character in a wide angle shot which shows the whole world down there, hence a vista shot take from a high angle to give a powerful impact. The shot at 5:46 shows a vista shot of the character on the bed. 


This is a close shot of the hands of various characters holding wine glasses in a static shot.


These two simultaneous, over the shoulder shots work a 180 degree rule whereby the camera is in the middle of the two characters and is following the axis-line that is leading to the affronting characters.   


These two shots are close up shots of the character as the camera the character in the background and the foreground is de-focused by the camera settings. This static shot usually focuses on the character that the director wants to focus on.


These are two different shots whereby shot 1 is an extreme close-up highlighting the characters expression to capture his peculiar emotion. The cut-off forehead gives an uncomfortable shrug to the audience as it is, while shot 2 is a mid-close up of the character whereby the background has been blurred which is somehow giving a comfortable feel to the environment while the sufficient head room and lead room allows the shot to create a relaxed ambiance all around.


This diagonal over-the-shoulder, mid shot of the characters in the front while sufficient room for lead room and head room gives the shot a very comfortable feeling which is felt by the audience as the tension disperses, filled in by appreciation and wonderment.